An Easy Way to Optimize the Position of Your Studio Monitors
29 Sep 2024
•
audio
•
engineering
•
studio
•
acoustics
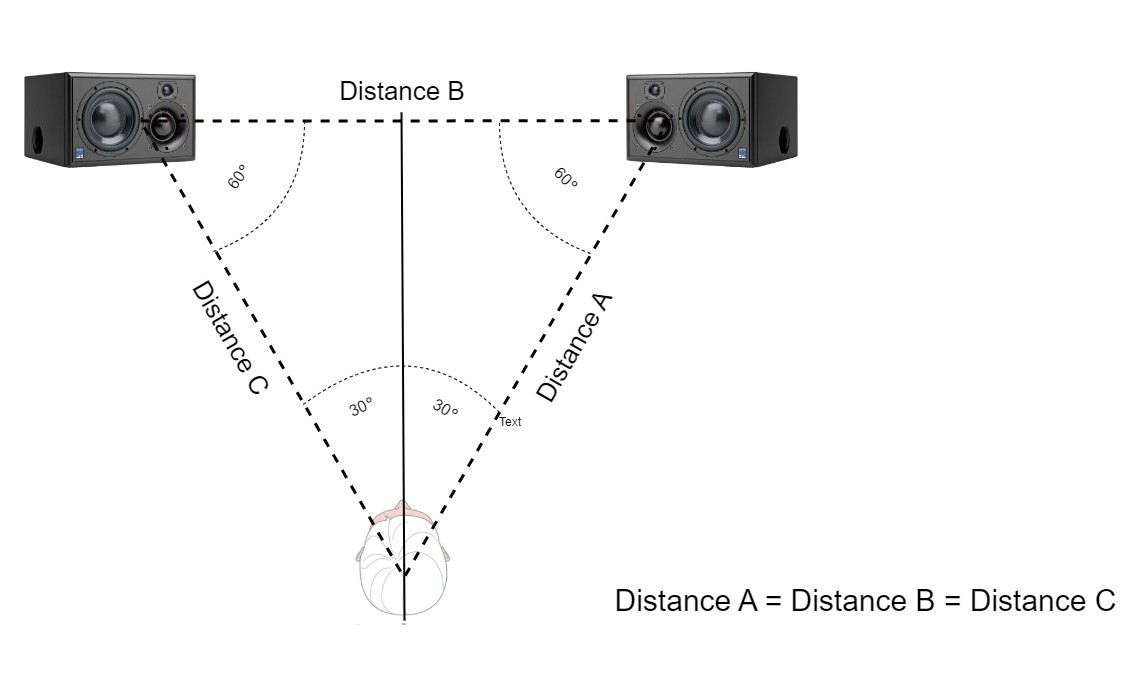
The golden rule of studio monitor placement dictates that there should be an equilateral triangle between your studio sweet spot and your stereo monitors where all angles and sides are congruent. For studio engineers, it's pretty common to eyeball this setup as it's often considered more important to learn and adapt to the unique characteristics of specific studio spaces and monitor setups. That being said, by applying some science to your monitor positioning practice you can potentially improve the listening quality in your studio by a factor.
In this post, I share an easy and practical way to find optimal placements for your studio monitor with just some simple tools and a little know-how.
Tools You Need
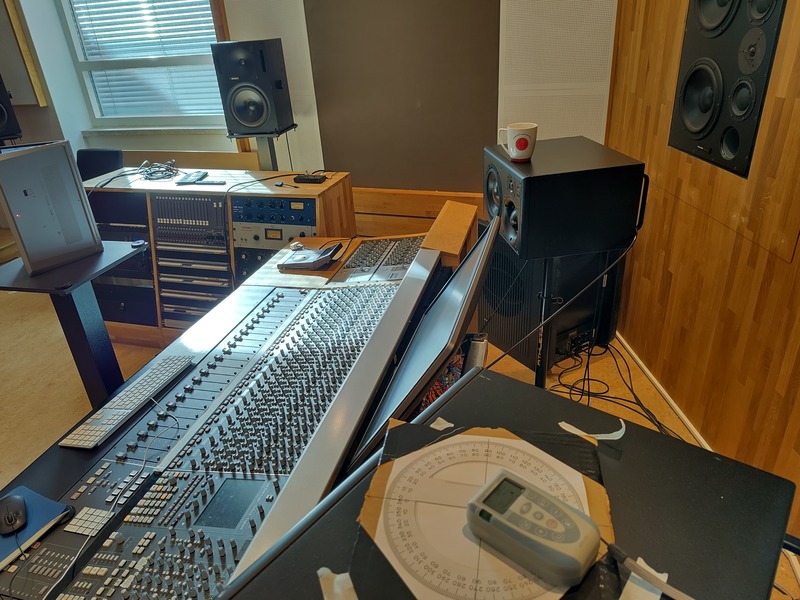
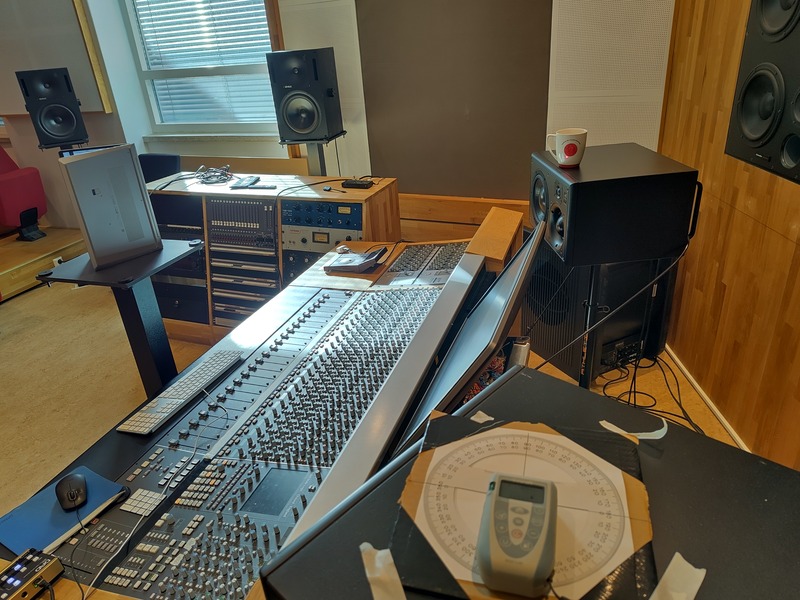
To accurately place an item in a 3D space, you need to know the item's azimuth (left-right), elevation (height) and distance from a fixed location. In a studio context, we usually already know the optimal height of the monitors as they should be horizontally aligned with the tweeter drivers and your ears while sitting at the studio sweet spot. This means you only need to figure out the azimuth and distance for correct positioning. For this, you need only two basic tools, 1) a protractor sheet and 2) a laser measurement device.
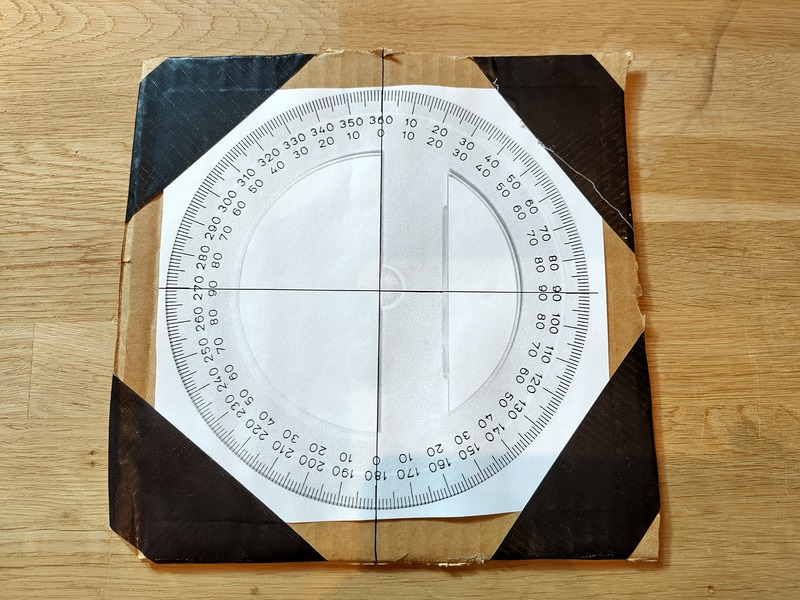
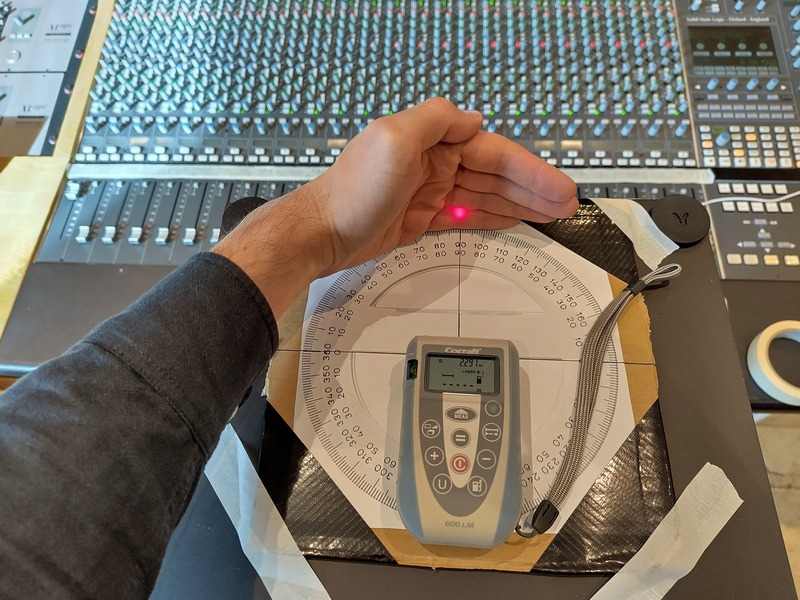
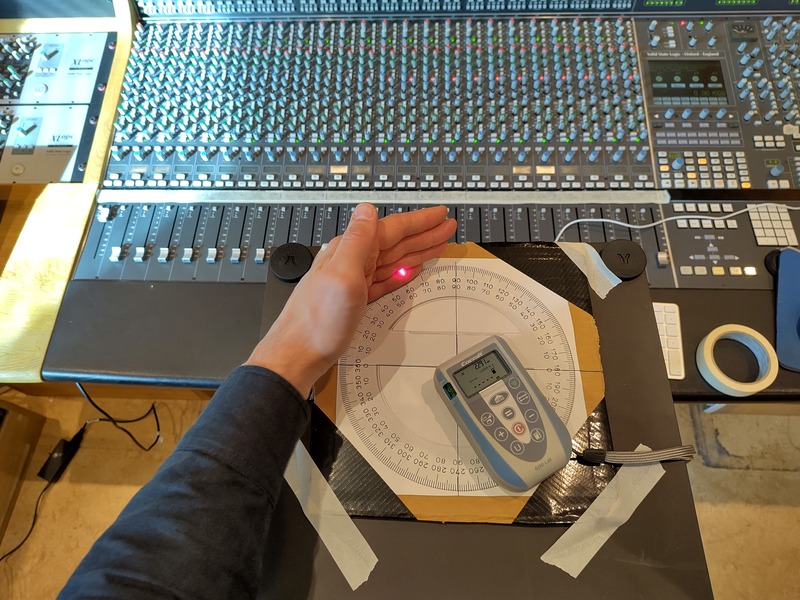
A protractor is a cheap and reliable tool that helps to measure angular degrees. When it comes to measuring speaker azimuth, I've found it best to make a custom protractor from a printed-out chart stuck to a square piece of thick cardboard. The cardboard adds some structural integrity and gives the tool a steady surface to attach in different places. Also, to create a better interface, I draw a cross with straight lines through the 0-180° and 90-270° angles to the edges of the cardboard, as a finishing touch.
Creating these kinds of measurement tools is pretty common in spatial audio communities. Artists, composers and technologists interested in spatial audio often have to adapt to many different speaker setups and therefore need reliable, cheap and accurate tools to manage speaker positioning.
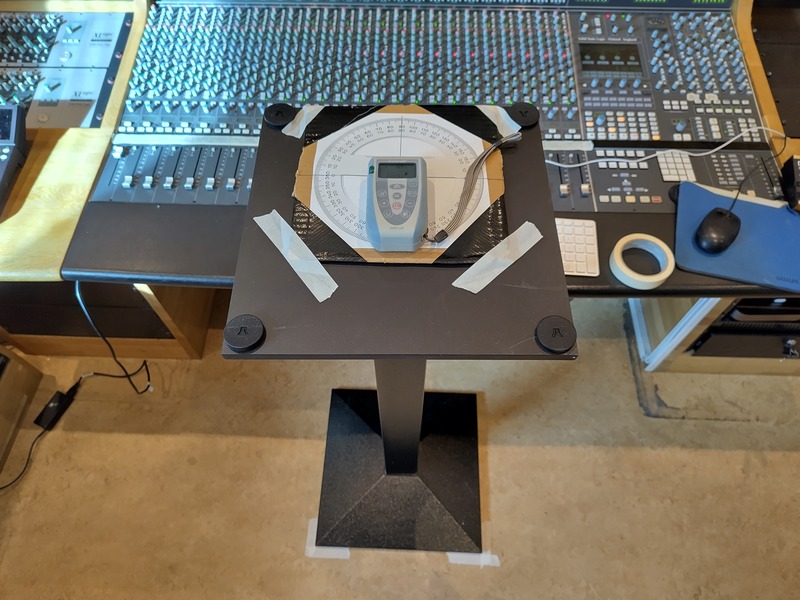
Together with the protractor, you need a small laser distance measuring device, like the CoCraft 600LM or something similar. A laser measuring device like this cannot only assist you in measuring distances, but it can also help to determine relative height between objects. This comes in handy a lot when dealing with anything 3D in a physical space.

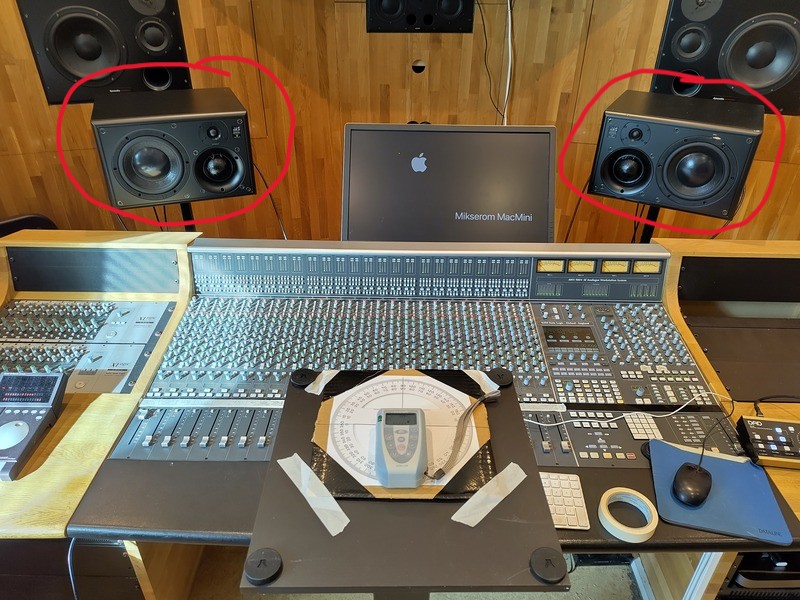
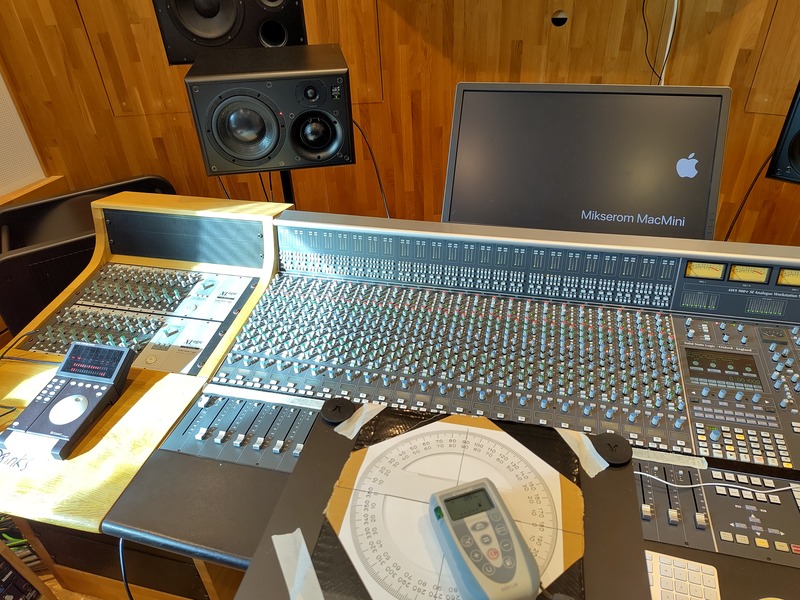
Finally, you will need a stand of sorts, preferably one with a flat surface where you can place and attach the protractor. The stand can be whatever, as long as it can be adjusted to the height of the monitor tweeters and fits in the sweet spot of your studio. For my example images in this post, I just use a robust speaker stand.
Measurement Procedure
Before measuring, you need to align the azimuth protractor to the studio space you are in. Start by placing the stand in the sweet spot and attach the protractor on top with some masking tape so it stays firmly in place. It's best to align the edges of the protractor with the edges of the stand, but that's not a must. What matters is that you align the center of the protractor (the line passing through 0° or 180°) toward the front center of the room as much as possible.
Next, place the measurement device at the very center of the protractor facing forward so that their edges are perpendicular. Now, adjust the laser's and stand's position so that the laser dot hits both 0° on the protractor and the center of your studio's front wall. It's wise to spend some time defining what the front center point of your studio is, from the vantage point of your desired sweet spot, as this will be the final reference point for the speaker positioning.
To cross-check that the protractor is aligned with both the studio center and 0° on the protractor, I usually just place my hand at the edge of the protractor in front of the laser to catch the azimuth-degree rotation and remove my hand again to see if the laser hits the studio front center. When the laser is properly aligned, add some masking tape on the floor to mark the exact position of the stand.
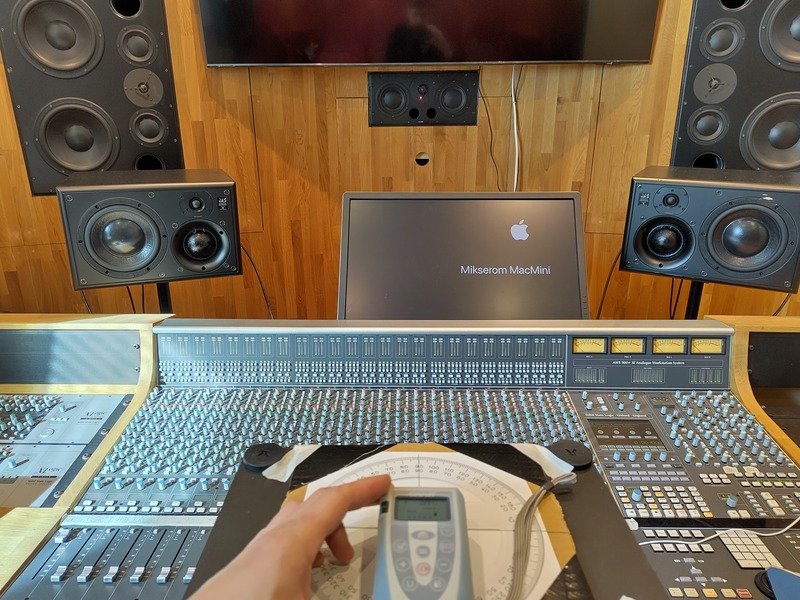
Now that the azimuth protractor is aligned to the studio space, simply rotate the laser measuring device 30° to both left and right to find the optimal horizontal position of the two monitors. During this process, I recommend first using the laser dot as a guide to position the monitors' azimuth and elevation levels before assessing and adjusting their distance.
As described in the introduction, the optimal relationship between studio monitors and the sweet spot is an equilateral triangle where all sides and angles are equal. So, when the initial monitor placements are done, it's time to move the point of reference from the sweet spot to the monitor position to check the distance between the monitors and adjust the angle between the monitors and the sweet spot to make sure they correspond with our other measurements.
Move the protractor to one of the two monitors and place a distance marker at the corresponding monitor and sweet spot stand. In my example, I use something as simple as a coffee cup and my laptop as distance markers. It's just something to catch the laser dot with. Next, center the protractor on the speaker and align it with the corresponding monitor's distance marker. Finally, make the distance measurements and check if they corroborate with your other measurements. Finally, rotate the laser 60° left or right to ensure that the sweet spot is correctly aligned with the current vantage point.
As you can tell, this part of the measurement procedure is an iterative practical process where you perhaps adjust monitor positions slightly and move back and forth between the two vantage points to make sure that all distances and angles are in order.
In Closing
There you have it. With a little basic trigonometry and cheap tools it's possible to get an accurate monitor setup in no time. Of course, the method discussed in this post is also something you can experiment with and expand/contract as you wish. But remember, there are almost infinite levels of measurement precision to achieve, so don't get lost in the details.
Happy listening!